


Potentiostat Diagnostic Tests
Back to Potentiostat Diagnostic Tests Back to Applications Back to Knowledgebase HomeWaveDriver Cell Cable Calibration
Last Updated: 5/21/19 by Neil Spinner
1WaveDriver Cell Cable Calibration
This test is performed during the system testing of a Pine Research WaveDriver potentiostat (WaveDriver 200
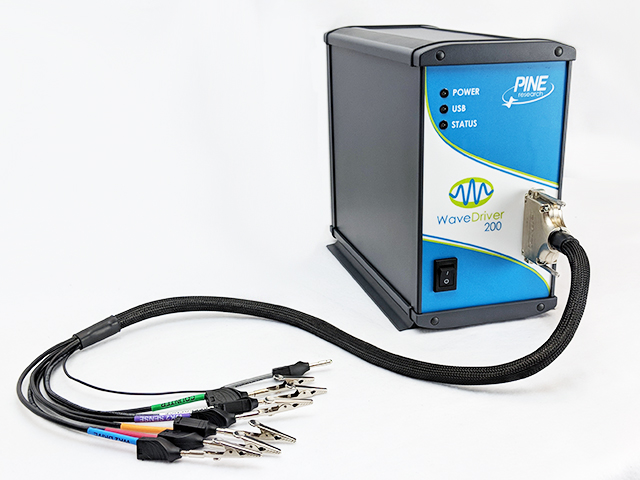 WaveDriver 200 EIS Bipotentiostat/Galvanostat
and WaveDriver 100
WaveDriver 200 EIS Bipotentiostat/Galvanostat
and WaveDriver 100
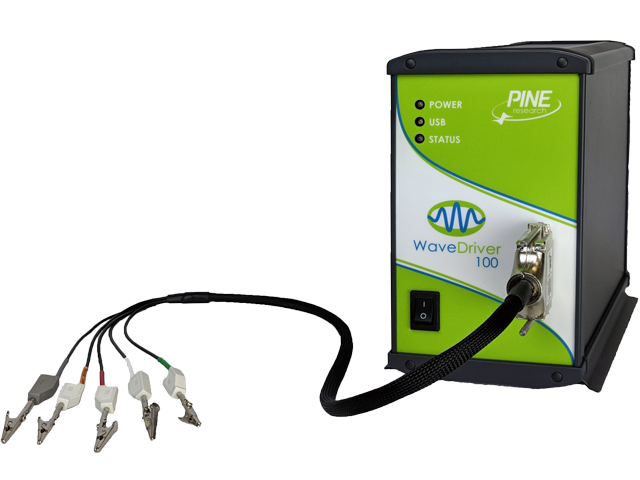 WaveDriver 100 EIS Potentiostat/Galvanostat
models).
WaveDriver 100 EIS Potentiostat/Galvanostat
models).
WaveDriver 200 EIS Bipotentiostat/Galvanostat
and WaveDriver 100
WaveDriver 100 EIS Potentiostat/Galvanostat
models).The electrical properties of the WaveDriver cell cable (resistance, capacitance, and inductance) can potentially interfere with electrochemical measurements. The effect of these cable properties on experimental data from DC electrochemical techniques is typically negligible; however, for AC techniques (such as EIS) the impact of the cell cable must be taken into account. Failure to properly calibrate and compensate for cell cable properties can lead to erroneous results, especially when making EIS measurements at high frequency.
1.1Connect to the EIS Calibration & Dummy Cell
Securely connect the cell cable to the front panel of the WaveDriver (see Figure 1). Position the EIS Calibration & Dummy Cell near the other end of the cell cable and locate the bottom row of banana jacks (labelled “CAL”). Note the position of the various colored banana jacks on this row.
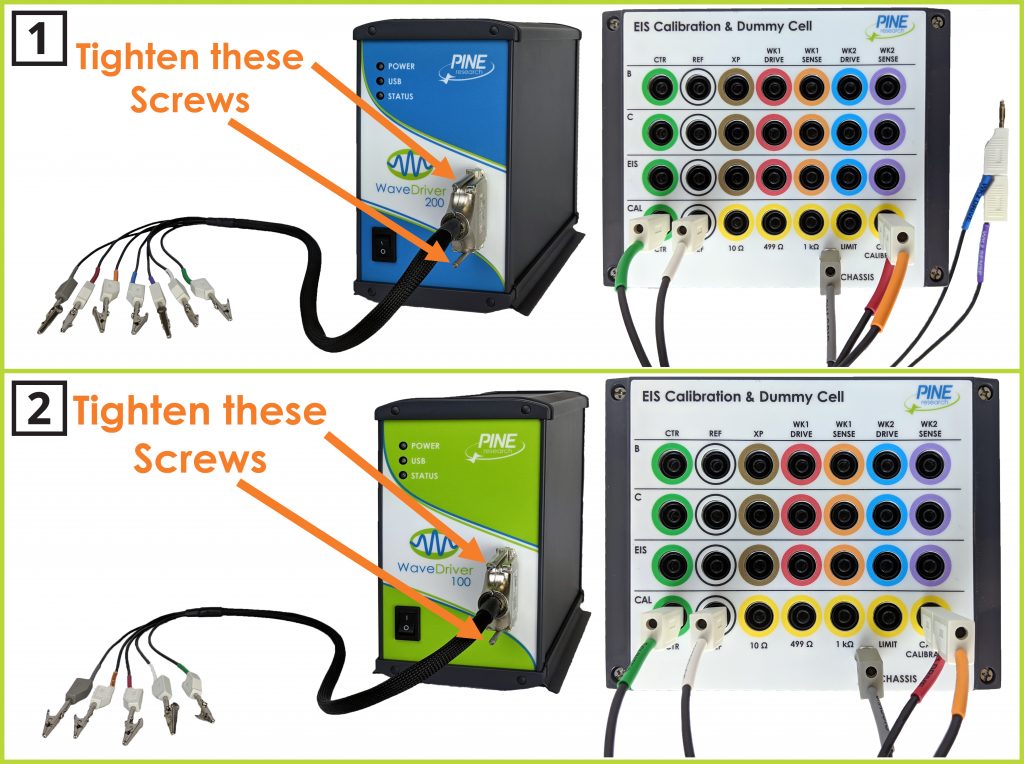
Figure 1. Cell Cable Connected to Dummy Cell Row “CAL” for Cell Cable Calibration for (1) WaveDriver 200; and (2) WaveDriver 100
Remove any alligator clips from the cell cable. Stack the banana plugs for the RED and ORANGE leads together (first working electrode drive and sense lines) and connect these stacked plugs to the yellow banana jack on the bottom row of the EIS Calibration & Dummy Cell labeled “CABLE CALIBRATION”. Also connect the banana plugs for the GREEN and WHITE leads (counter and reference electrode lines) on the cell cable to the corresponding individual GREEN and WHITE banana jacks. Finally, connect the GRAY banana plug to the dummy cell chassis.
1.2Create a Cable Calibration (EIS-CCAL) Experiment
Choose the Cable Calibration (EIS-CCAL) option from the Impedance Spectroscopy sub-menu in the AfterMath Experiments menu. A new EIS-CCAL specification will be created and placed into a new archive. Unlike other experiments in AfterMath, EIS-CCAL does not require the user to fill in any parameters. Still, there are grayed-out experimental parameters shown that confirm certain details related to the calibration experiment, including the dummy cell being used (Pine Research part number AFDUM5), the Load Capacitance used during calibration, and the Target Frequency at which cable capacitance is calculated (see Figure 2).
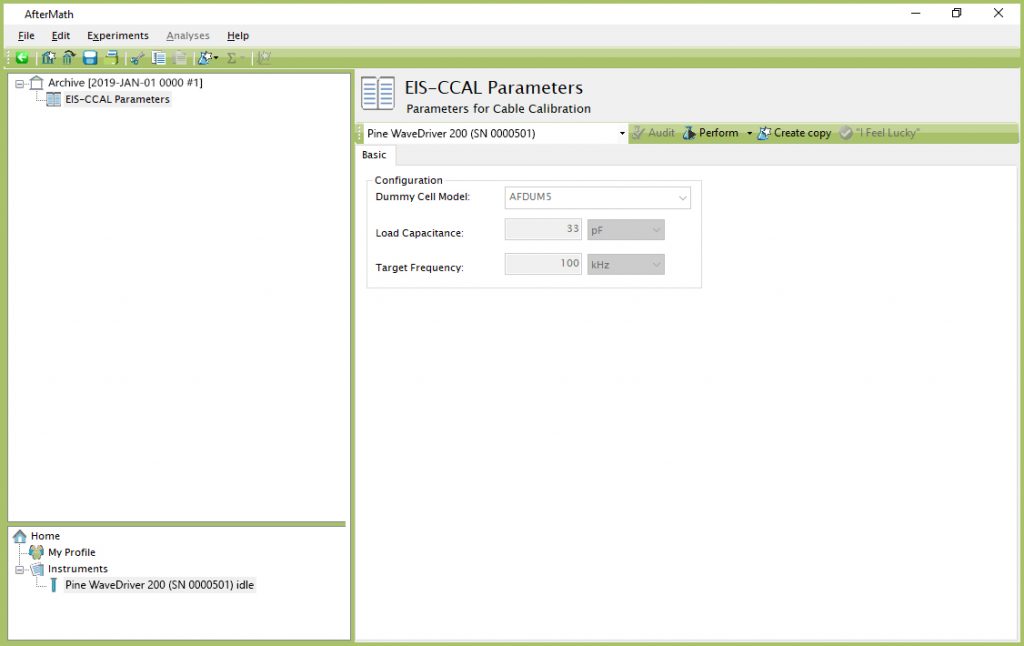
Figure 2. Cable Calibration (EIS-CCAL) Experiment Dialog Window
1.3Initiate the Experiment
Click on the “Perform” button to initiate the EIS-CCAL experiment. The “Perform” button is located to the right of the “Audit” button, which in this case is grayed-out and inaccessible (see Figure 2).
1.4Monitor Experimental Progress
Monitor the progress of the EIS-CCAL experiment in AfterMath by observing the real time plot and the progress bar (see Figure 3). Procedurally, a short EIS experiment will occur with live data updating automatically. Similarly to an actual EIS test, the default live display shows Lissajous plots, but Bode or Nyquist plots can also be observed in real time if desired.
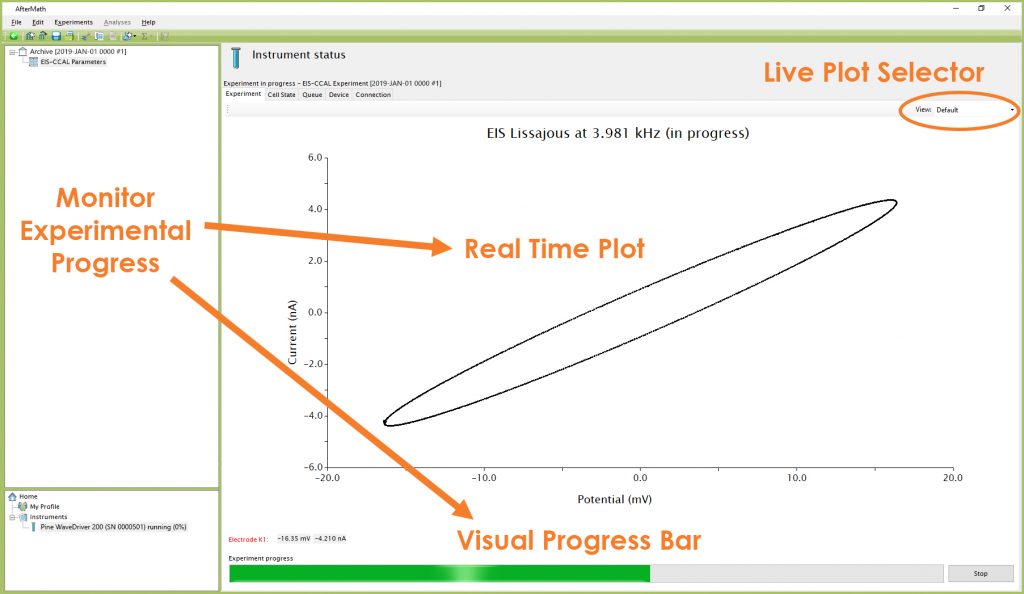
Figure 3. Monitoring the Progress of the EIS-CCAL Experiment
1.5Review the Results
After the experiment has finished, AfterMath automatically determines the cable capacitance and stores the capacitance value inside the instrument for use with subsequent EIS experiments. The measurement details are shown as a plot in the experimental results (see Figure 4), and the plot title indicates the measured capacitance value. Generally, the cell cable capacitance falls in the range from 50 to 150 pF depending on the particular design and length of the cell cable.
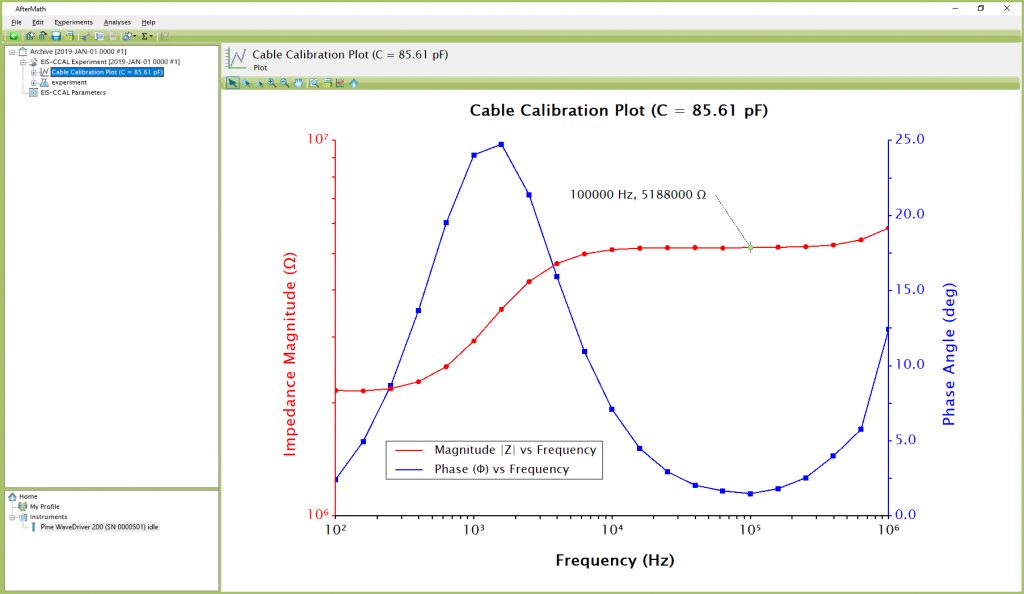
Figure 4. Anticipated EIS-CCAL Results (using Dummy Cell “CABLE CALIBRATION” Setup)