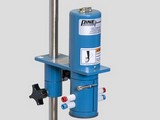
 This article is adapted from Section 8 of the User Manual for the Pine Modulated Speed Rotator (MSR).
Related Links: MSR User Manual, MSR Rotator Support Page, Pine Research Instrumentation
[/call_to_action]This section describes some basic troubleshooting considerations when working with a rotator. Each of the basic problems is represented in a toggle below with suggested cause or action that should be taken. If problems with the rotator persist, contact the factory for further assistance (see Section 1.5).
[toggle title = “No Rotation”]If the rotator is not rotating, consider the following:
- Confirm that the unit is connected to a live power outlet.
- Confirm that the power switch has not tripped and that it is in the “on” position. Reset the switch if necessary.
- Check the front panel circuit breaker and reset the breaker if necessary.
- Check the motor control cable which connects the control unit to the motor unit. The connectors at both ends of this cable must be secured using the two screws on each connector.
- The rotation rate knob may be set to full counterclockwise position. If this is the case, then rotate the knob clockwise to increase the rotation rate.
- The motor, the shaft or one of the bearings may be frozen due to corrosion, or one of the boards or cables may be loose. Turn off the rotator, disconnect power, and then try the following procedure:
[call_to_action] WARNING:
Risk of electric shock.
Disconnect all power before servicing the rotator.AVERTISSEMENT:
Risque de décharge électrique.
[/call_to_action] Check for freedom of rotation of the shaft by manually attempting to rotate the shaft.
Déconnectez toutes les sources d’alimentation avant de procéder à l’entretien du rotateur.
Look inside the control unit and confirm that the printed circuit board is fully inserted into its connector.
If the rotator is continuously rotating at a high rate, consider the following:
- Check the motor control cable which connects the control unit to the motor unit. The connectors at both ends of this cable must be secured using the two screws on each connector.
- Faulty connection or wire – contact the factory.
- Faulty circuitry – contact the factory.
If the rotator experiences a system power loss, consider the following:
- The main power switch on the back panel is a circuit breaker which may trip and cause the system to lose power. To reset the breaker, turn the switch off and then turn the switch on again. Repeated tripping may indicate a more serious problem.
If the front panel circuit breaker trips, consider the following:
-
This breaker only trips if the current passing through the motor windings is high enough to potentially damage the motor. This could occur if the electrode is spinning in a particularly viscous liquid, if the shaft is rubbing against something, or if an applied periodic waveform controlling the rotation rate has too great an amplitude or frequency.
This breaker (thermal type) is sized to limit the average motor current to within the motor specification. Running the motor at a high modulation frequency, or with large amplitude changes, or a combination of the two, may cause tripping. It may be necessary to reduce the modulation frequency and/or amplitude to prevent tripping of the breaker.
If the rotator is spinning backward, consider the following:
- When the rotation rate knob is in the full counterclockwise position, it is natural to expect that the rotation rate should be exactly zero. However, it is normal for there to be a small residual rotation rate, and often this is in the reverse direction.
- If a negative voltage signal is applied to the INPUT jacks on the front panel of the control unit, then the rotator will spin backwards. If this is undesirable, reverse the polarity of the signal applied to the INPUT jacks.
If the rotator is excessively loud, consider the following:
- If the rotator has a standard lower bearing assembly with a stainless steel bearing, then this bearing may be corroded. If corroded, replace the entire lower bearing assembly.
- Internal spindle bearings are worn – contact the factory.
Electrical noise in voltammograms can be caused by a number of factors. Broadly, these factors are categorized as environmental, grounding issues, brush wear, and cell connections. They are discussed separately below.

