


Relaxation Period
Last Updated: 1/9/23 by Alex Peroff
1General Overview
At the end of an experiment, you may specify a period of time during which particular signal level(s) are applied to the working electrode(s), perhaps to allow the cell to re-equilibrate with a set of conditions where no electrochemical activity is occurring. During this “relaxation period”, no data are acquired.
Careful choice of the proper relaxation conditions is required when you are attempting to mitigate the affects of cell switching.
 Cell and Circuit Switching
You can adjust the relaxation period conditions to match the post-experiment idle conditions.
Cell and Circuit Switching
You can adjust the relaxation period conditions to match the post-experiment idle conditions.
When an experiment completes, the instrument circuitry must be adjusted to meet the needs of a particular electrochemical technique. The adjustments include various “cell switching” actions such as adjusting the current range, selecting various filter circuits, turning on (or off) various relays, connecting the external cell to the control amplifier, choosing the mode (open circuit, potentiostat, or galvanostat) of the working electrode(s), and finally, applying the initial signal level to the working electrode(s). More on cell switching is found within the knowledgebase.
Cell and Circuit Switching
Unless careful steps are taken to minimize cell switching glitches, all of this initial commotion is likely to cause a few minor interruptions in cell control and some transient current flow at the working electrode. After a few milliseconds or so, these transients die away, and the cell comes to equilibrium with the new instrument settings.
In most cases, you do not want these instrument-induced current transients to be recorded as part of the experimental results. The purpose of the relaxation period is to provide a short period of time for the cell to equilibrate with the final instrument settings prior to moving to the selected post-experiment conditions. Data are not recorded during the induction period.
The default duration of the relaxation period is usually one (1) second. The default signal level (unless otherwise specified) is typically selected to match the initial signal level of the waveform being applied to the working electrode during the active measurement portion of the experiment. The figure below shows the relaxation period (and induction period
Induction Period
) controls which are normally found on the Advanced tab for an experiment specification
Specification
(but in some cases, these fields are on the Basic Tab) (see Figure 1). In this figure, a relaxation period with default duration and signal levels is used because the “Auto” checkbox is checked.
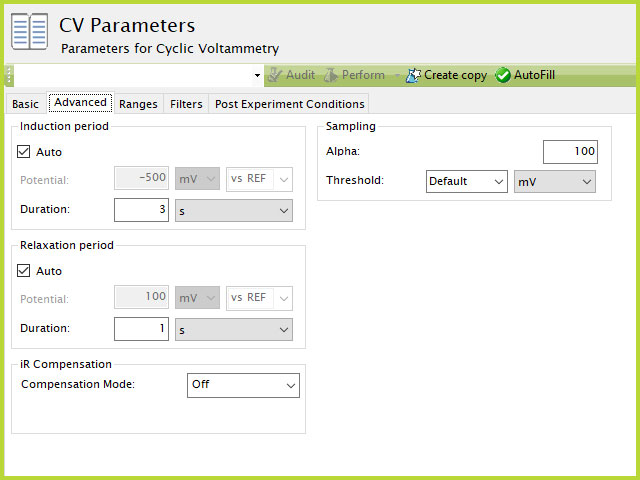
Figure 1. Typical Induction and Relaxation Period Settings in AfterMath
In general, the signal level applied to the working electrode(s) during the relaxation period should be chosen so that there is no significant current at the working electrode (i.e., a condition at which no redox process is occurring at the working electrode).
In a potentiostatic experiment
Potentiostatic Methods
, choosing the right potential requires some prior knowledge or experience with the electrochemical system being studied.
In a galvanostatic experiment
Galvanostatic Methods
, of course, simply choosing to apply zero amperes during the induction period will minimize the amount of electrochemical activity at the working electrode.
Immediately after the relaxation period duration ends, the potentiostat moves to post-experiment conditions.
If you do not wish to use the default settings for the relaxation period duration or signal levels, then you can uncheck the “Auto” checkbox as shown in the figure below (see Figure 2). When this box is unchecked, then you may set the duration and signal levels to any values that you wish. In the example below, the duration of the relaxation period has been set to 2 min and the signal level for the working electrode has been set to -300 mV .

Figure 2. Manually Set Induction and Relaxation Period Settings
This means that as soon as the experiment completes, the working electrode will be held at -300 mV for 2 minutes before moving to post-experiment conditions . During this time, no data is acquired. After the 2 min relaxation period duration has passed, then the post expeirment conditions are applied to the working electrode.