This article is part of the AfterMath Data Organizer User’s Guide
Using Report Layout
Most of the individual items in an archive have a printable representation suitable for sending to a hard copy printer. When you print an individual item in this manner, you are only able to print one item per page. Sometimes, it is desirable to print more than one item per page. For example, you may wish to put a plot of some experimental results at the top of a page and also include a list of the experimental parameters at the bottom of the same page.
When you want to print more than one item per page, you need to create a page layout. Proper page layout preoccupies the mind of many a graphics designer, but most scientists have fairly simple needs when it comes to reporting results in hard copy form. AfterMath lets you configure a grid-based layout using one of several standard international page sizes.
Creating a new Layout
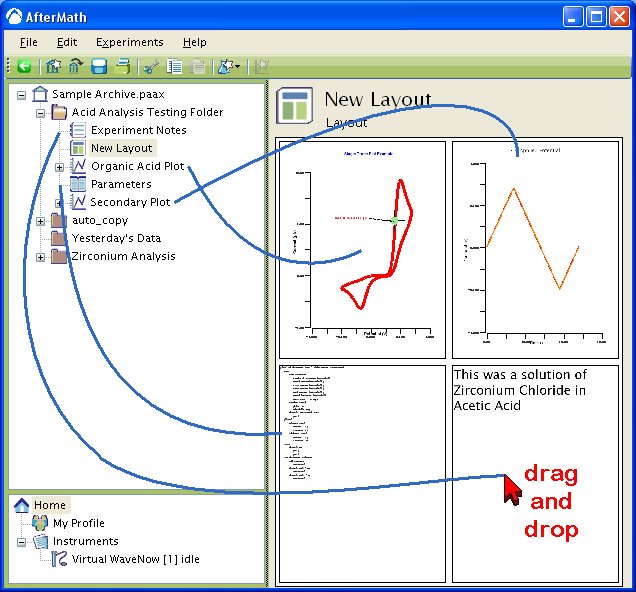
Creating an AfterMath layout involves choosing a paper size, deciding how many grid elements are needed on the page, and then literally dragging the items from the archive on to the various grid elements. This last step is performed using drag-n-drop mouse actions.
Step 1
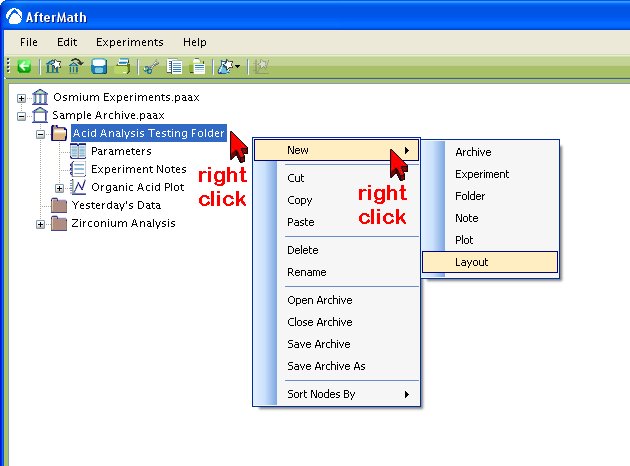
The first step in creating a new layout is to decide where in the archive to put the layout. In general, it is good practice to copy all of the items that will appear on a layout into the same folder and then create a new layout item in that very same folder. In the example below, several items have been copied into a folder called “Acid Analysis Testing Folder”. A new layout is created in the folder by right-clicking on the folder and choosing “New » Layout” from the popup menu.
Step 2
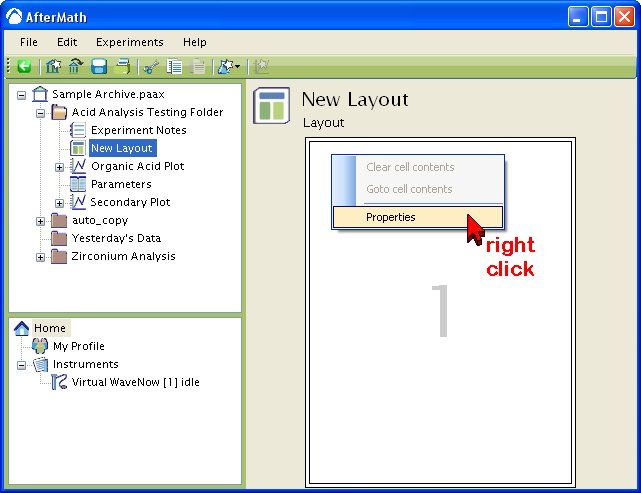
By default, a new (empty) layout has only one grid element which consumes the entire page. You can change the number of grid elements (and the paper size) by right-clicking on the layout and choosing the “Properties” option.
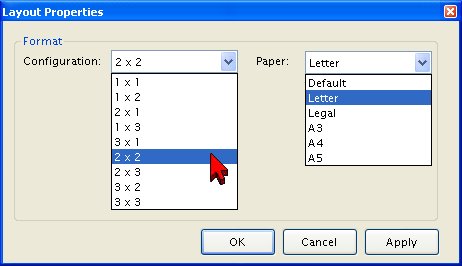
On the “Layout Properties” box, there are a variety of grid configurations available, allowing you to place anywhere from one to nine different items on the page.
Moving and Copying
Once you have created a layout, you can move it to any location within the same archive that you wish. But it is usually a good idea to keep it in the same folder as the items which you have placed on the layout (see note below).


Comments: