


Potentiostat/Software Installation Quick Start
Last Updated: 10/28/20 by Tim Paschkewitz
Download as PDF1Initial Setup and Installation of New Potentiostat
Because all of our potentiostats interface to PCs by USB, when Windows® detects that a device is connected by USB, it immediately searches for what it thinks is the most appropriate hardware driver. Unfortunately, in many cases, Windows selects the incorrect driver and associates it with your new potentiostat. Then, when you start AfterMath, you may notice that the potentiostat is not found and there is a red or orange blinking LED on the potentiostat. This is most likely caused by an incorrect driver association. To avoid this, follow this quick guide and adhere to the order of operations, to ensure the correct driver is installed, making your potentiostat ready to use for electrochemical studies.
1.1Step 1: Find the User Guide
This is typically a black binder located inside the main box or within the inner box if present.
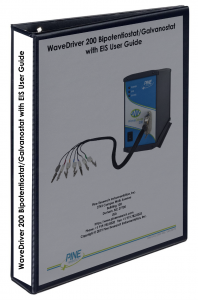
Figure 1. WaveDriver 200 Integrated Bipotentiostat with EIS User Guide
1.2Step 2: Leave the Potentiostat in the Box
You will not need the instrument yet. Keep it safe until required in later steps.

Figure 2. Pine Research Instrumentaiton Shipping Box
1.3Step 3: Obtain the USB Flash Drive
It is located in a plastic flap inside the user guide. Connect it to your PC.

Figure 3. Pine Research Potentiostat Installation Media (USB Flash Drive)
1.4Step 4: Install AfterMath Software
Double-click the Windows Installer Package named “Setup” as shown below.
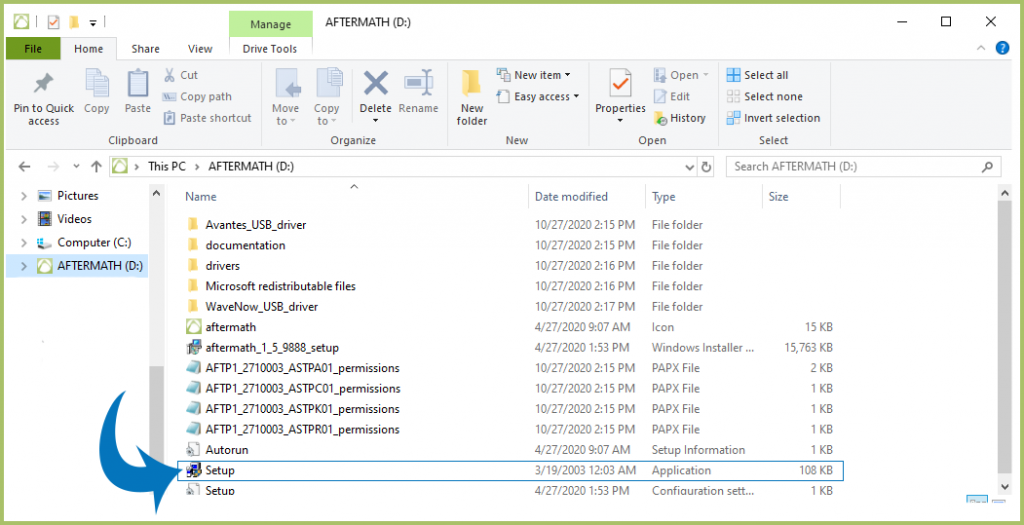
Figure 4. Installation of AfterMath
1.5Step 5: Install Device Driver
During the course of AfterMath installation, you will be prompted to install the device drivers. Proceed by clicking Next:
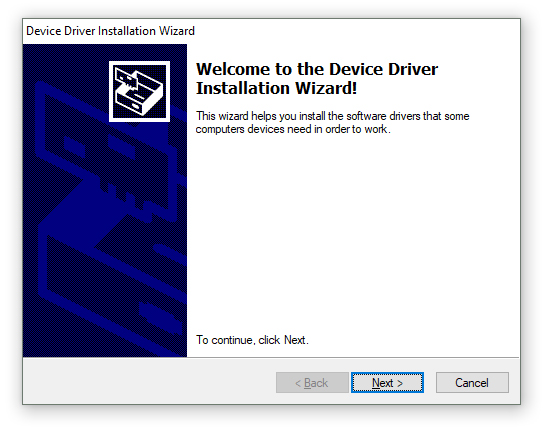
Figure 5. FTDI USB Device Driver Installation Dialog
Verify the drivers were installed as shown in the complete dialog:

Figure 6. FTDI USB Device Driver Installation Complete Dialog
Continue through any remaining steps to finish the installation.
1.6Step 6: Connect Potentiostat to Computer by USB Cable
Now that AfterMath software, instrument drivers, and support software have been installed, carefully unpack the potentiostat and connect it to your computer with the supplied USB cable.
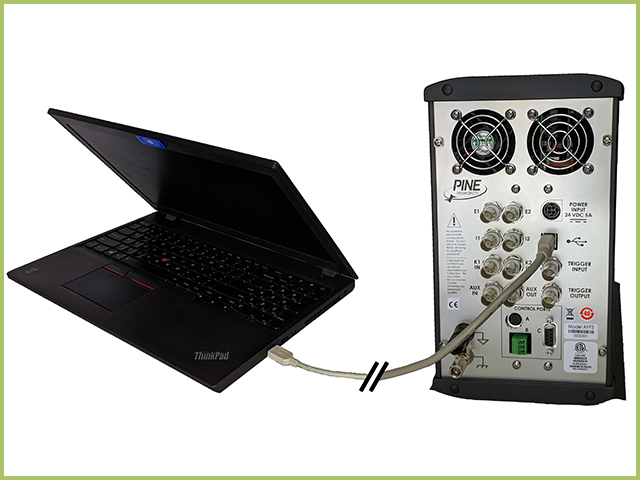
Figure 7. Connecting the USB cable between WaveDriver 200 and PC.
1.7Step 7: Power On Potentiostat
Upon turning the potentiostat on, you should notice a Windows® notification (popup and/or sound) indicating that it detected new USB hardware. Wait about 30 seconds before proceeding to step 8.
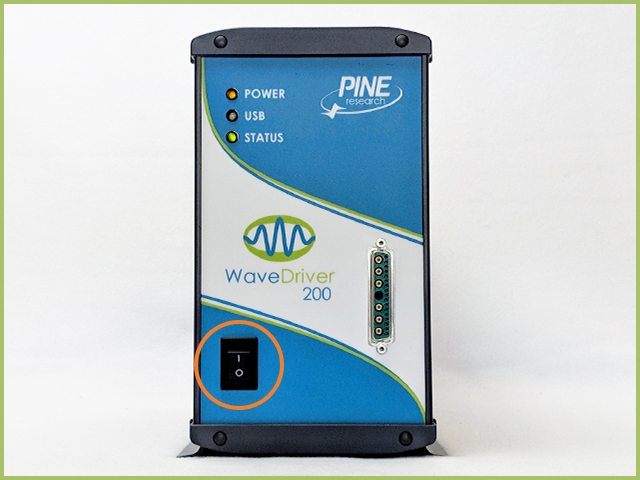
Figure 8. WaveDriver 200 with AC adapter connected and potentiostat powered on.
1.8Step 8: Start AfterMath
You may have selected to place a shortcut on your desktop.
If not, find where AfterMath was installed on your computer. Most commonly, the location is:
C:\Program Files (x86)\Pine\AfterMathOpen/start the aftermath.exe application in the folder.
1.9Step 9: Verify the Status of the Potentiostat in AfterMath
View the connected instruments in AfterMath. You should observe an entry for the potentiostat with its serial number in the Idle state.
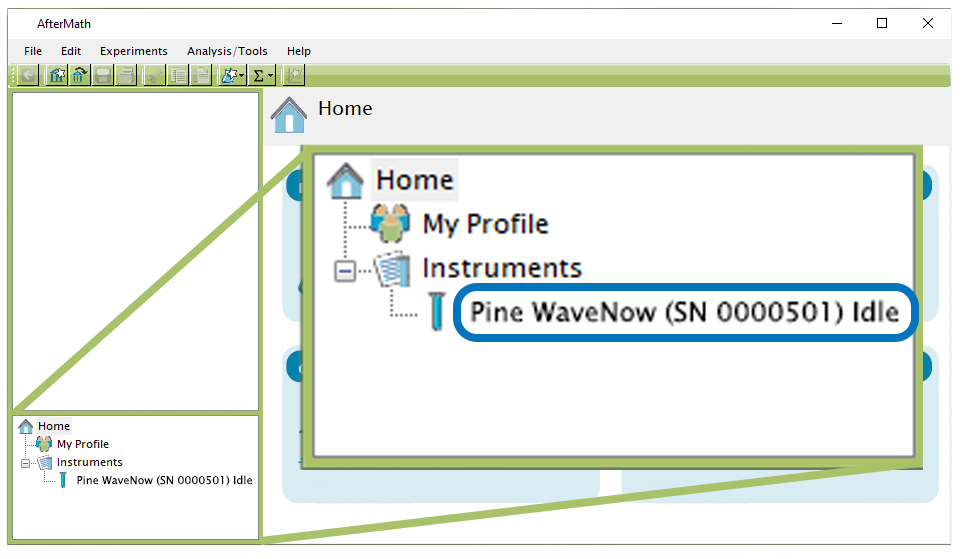
Figure 9. Connected WaveNow Potentiostat shown in AfterMath Software
Finished! If you have any issues or need further assistance, please contact us.