mobile-main-menu-button
Menu

Category Archives: Uncategorized

  • AfterMath Module: ASCBA01


    AfterMath_NEW

    This AfterMath software module includes support for dual electrode and other popular electroanalytical techniques on the CBP Bipotentiostat system from Pine Research Instrumentation. A list of all supported methods is provided below.

    Potential Sweep Methods

    Potential Step Methods

    Galvanostatic Methods

    Cyclic Step (Charge/Discharge) Methods

    • Cyclic Step Chronoamperometry (CSCA), capable of charge/discharge under potentiostatic control
    • Cyclic Step Chronopotentiometry (CSCP), capable of charge/discharge under galvanostatic control

    Dual Working Electrode Methods

    • Dual Electrode Bulk Electrolysis (DEBE), controlled potential, controlled current, or open circuit potential
    • Dual Electrode Cyclic Voltammetry (DECV), includes collection, shielding, window, and diametric variants

    Passive Methods

    Potential Pulse Methods

    Stripping Voltammetry

    Hydrodynamic Methods

    Note: Control of the rotation rate by the potentiostat requires a special cable (click here for details).

    • Koutecky-Levich RDE Series (KL-RDE), acquires series of rotating disk voltammograms at various rotation rates
    • Rotating Disk Electrolysis (BE-RDE), supports constant voltage, constant current, or open circuit measurements
    • Rotating Disk Chronopotentiometry (CP-RDE), galvanostatic control of a rotating disk electrode
    • Rotating Disk Ramp Chronopotentiometry (CRP-RDE), includes Rotating Disk Cyclic Chronopotentiometry

    Part Numbers

    Click here to go to Pine's commercial web site for the AfterMath Data Organizer software.

    This module is assigned the following Pine Part #: ASCBA01 with description: General & Dual Electrode Electroanalytical Methods (AFCBP1 single instrument license)

    Additional Resources

    Read More
  • AfterMath Installation: Step-by-Step

    AfterMath_NEW
        This article is part of the AfterMath Data Organizer User’s Guide

    To install AfterMath, five easy steps should be taken:

    1. Install the software
    2. Install the hardware
    3. Connect the Instrument to the Computer
    4. Run the AfterMath application
    5. Remove the software if desired

    1. Software Installation

    The software may be installed using two methods:

    1. The CD supplied with the purchase of the instrument. To use the supplied CD, insert it into the computer. If autoplay is enabled for the drive, the installation will begin automatically. Otherwise, navigate to and execute the “Setup.exe” file on the CD.
    2. By using the MSI file downloaded from this page.

    icon_info.jpgNOTE:

    Web-based installations are not authorized to run experiments on an instrument and can therefore only be used to view and manipulate existing data previously produced by a CD-based installation. This enables a researcher to use the fully-enabled application in the lab to produce results but use this partially-enabled version to work with the results outside the lab environment.

    Both installations navigate through the following steps:

    Begin installation

    If all pre-requisite software is already installed, the AfterMath installation begins with a “Welcome” dialog:

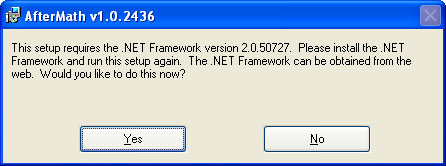
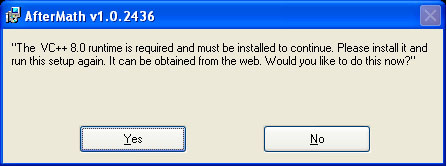
    However, if any of the following dialogs appear first then the necessary pre-requisite software must be installed before continuing. Follow the links provided for step-by-step instructions on installing these packages (connection to the internet required):

    1. .NET Run-time Files
      If either of the dialogs below appear, install the .NET run-time files. Please re-start the installation after this step.

    2. Visual C++ Run-Time Files
      If the following dialog box pops up, please install the visual C++ run-time files. Please re-start the installation after this step.

    Continue installation after pre-requisites have been met

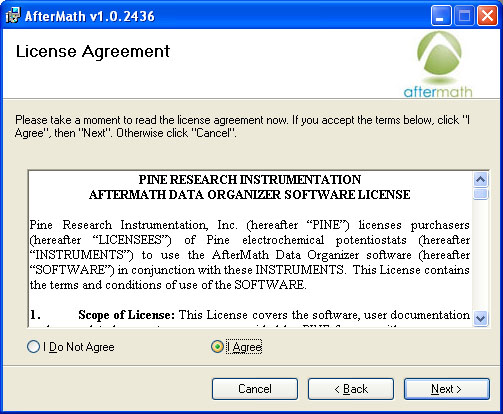
    Select “Next” to continue to the “License Agreement”. If the terms of the license are acceptable, then check the “I Agree” box and select “Next” to install:

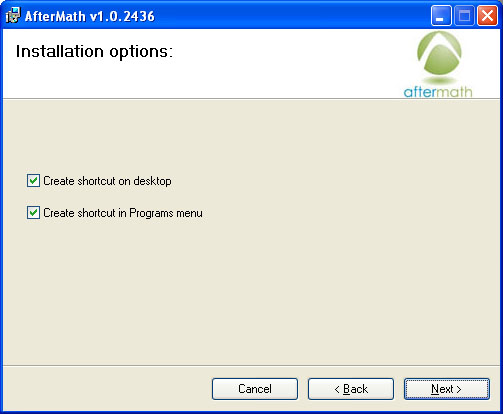
    There are options to create (or not) shortcuts to run the application on the desktop and Programs menu. Make the desired selections and select “Next”:

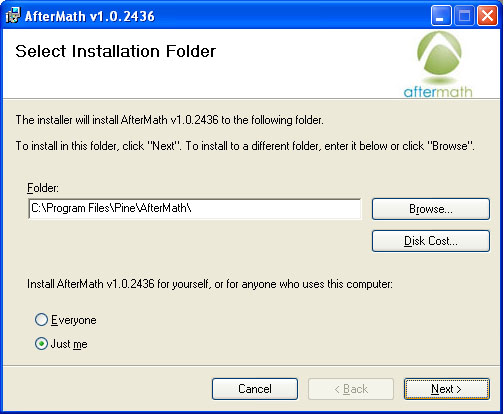
    The location for the application and whether it is installed for all users or the currently logged-in user may be modified, then select “Next”:

    Select “Next” to confirm the installation settings and begin the actual installation process:

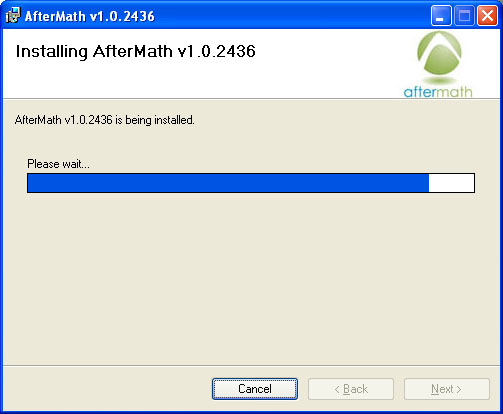
    A progress dialog similar to the following should appear:

    2. Device Driver Installation

    Some AfterMath installation packages will automatically install device driver software for your potentiostat. For example, if you are installing AfterMath from a CDROM shipped with a WaveNow or WaveNano potentiostat, the device drivers for these instruments will automatically be installed at this point. The screen shots below show how this phase of the installation appears. Note that for some instruments, such as the CBP bipotentiostat system, the device driver is not automatically installed and must be installed in a separate step.

    The hardware device driver installation should follow. Select “Next” to continue:

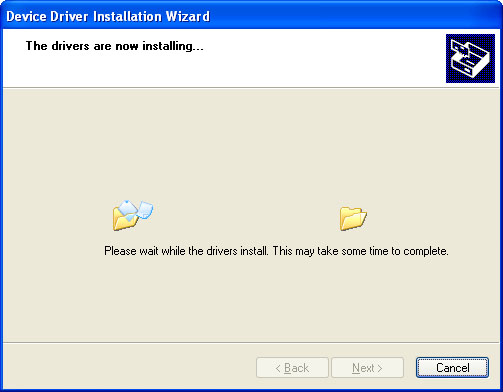
    A progress dialog similar to the following should appear:

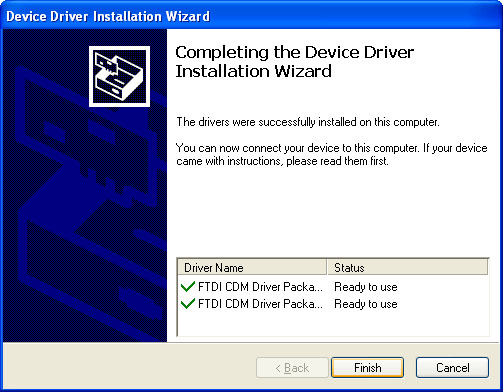
    The following notice should appear when the hardware driver installation is complete. Select “Finish” to continue:

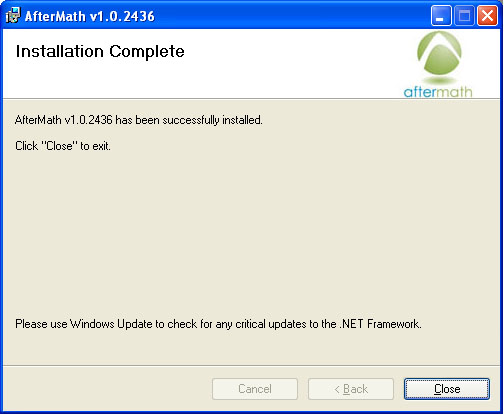
    The following final notice should appear when entire installation is complete. Select “Close” to finish:

    3. Computer Connection

    If you are installing AfterMath for use with a USB instrument (such as a WaveNow or WaveNano potentiostat), then at this point, you should connect the instrument to the computer using the supplied USB cable. Then, connect the instrument to its power supply and turn on the power. Once you have turned on the power to the instrument, Windows should recognize that the new hardware has been connected. This process may take anywhere from 5 to 30 seconds.

    If you are installing AfterMath for use with a PCI bus instrument (such as the CBP Bipotentiostat system), then at this point, you should install the NIDAQ device driver software (this is a separate installation process). Once the NIDAQ device driver is installed, you should turn off your computer and physically install the interface board in a free PCI slot inside your computer. Then, you can turn your computer back on and Windows should recognize that the interface board has been installed. After that, you can connect your instrument to the interface board using the appropriate cable.

    icon_info.jpgINFO:

    If the order of installation presented here is not followed and the instrument is connected to your computer before you have installed the device driver software, then the instrument may not be recognized by Windows or by AfterMath.

    4. Run the AfterMath application

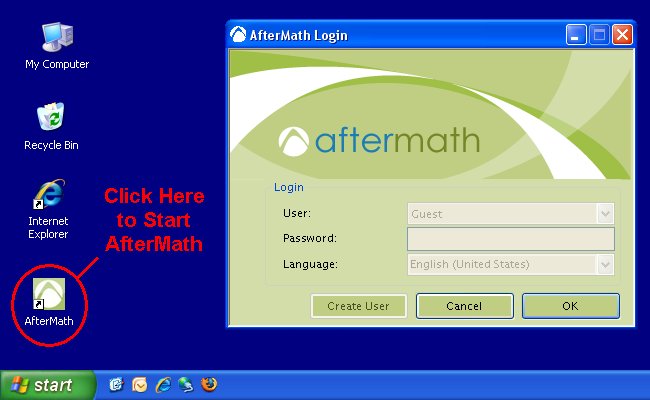
    The installer optionally (and by default) creates a desktop shortcut and another shortcut in the Windows Start Menu, either of which you may use to start the AfterMath software. Once you have started the application, the login screen (see below) appears.

    aftermath_shortcut_login.jpg

    icon_info.jpg NOTE:

    If the order of installation described on this web page (above) is not followed, and especially if AfterMath is started prior to installing the hardware for the first time, then no instruments will appear in the AfterMath Instrument List.

    5. Removal

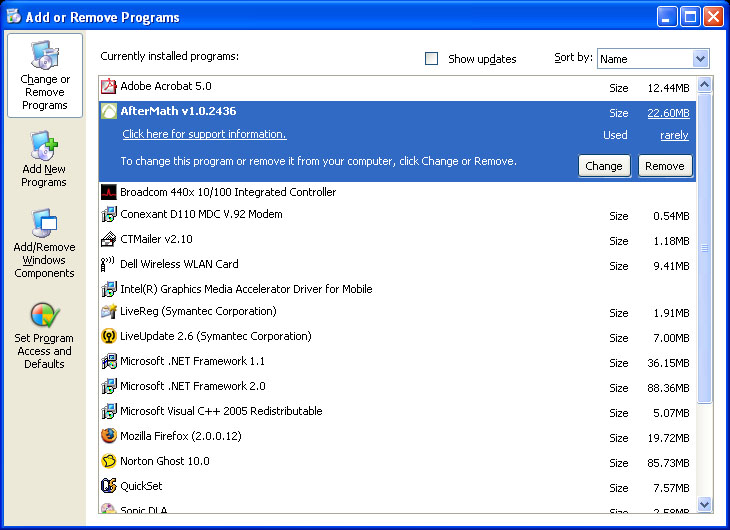
    The application can be uninstalled using the Add-Remove Programs dialog (as seen below). Select “AfterMath” and then the “Remove” button.

    Read More
  • AfterMath Installation: Step-by-Step .NET Run-Time Files

    AfterMath_NEW
        This article is part of the AfterMath Data Organizer User’s Guide

    The installer will first verify that the target machine has the required version of MicroSoft .NET files. If the required version is not found, then one of the following dialogs may appear:

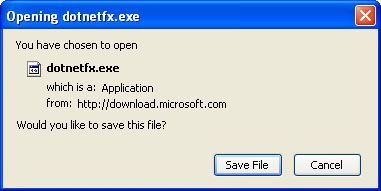
    Select “Yes” to download the files from the MicroSoft website. Depending on the default web browser installed on the target machine, a dialog similar to the following should appear in regards to downloading the file “dotnetfx.exe”:

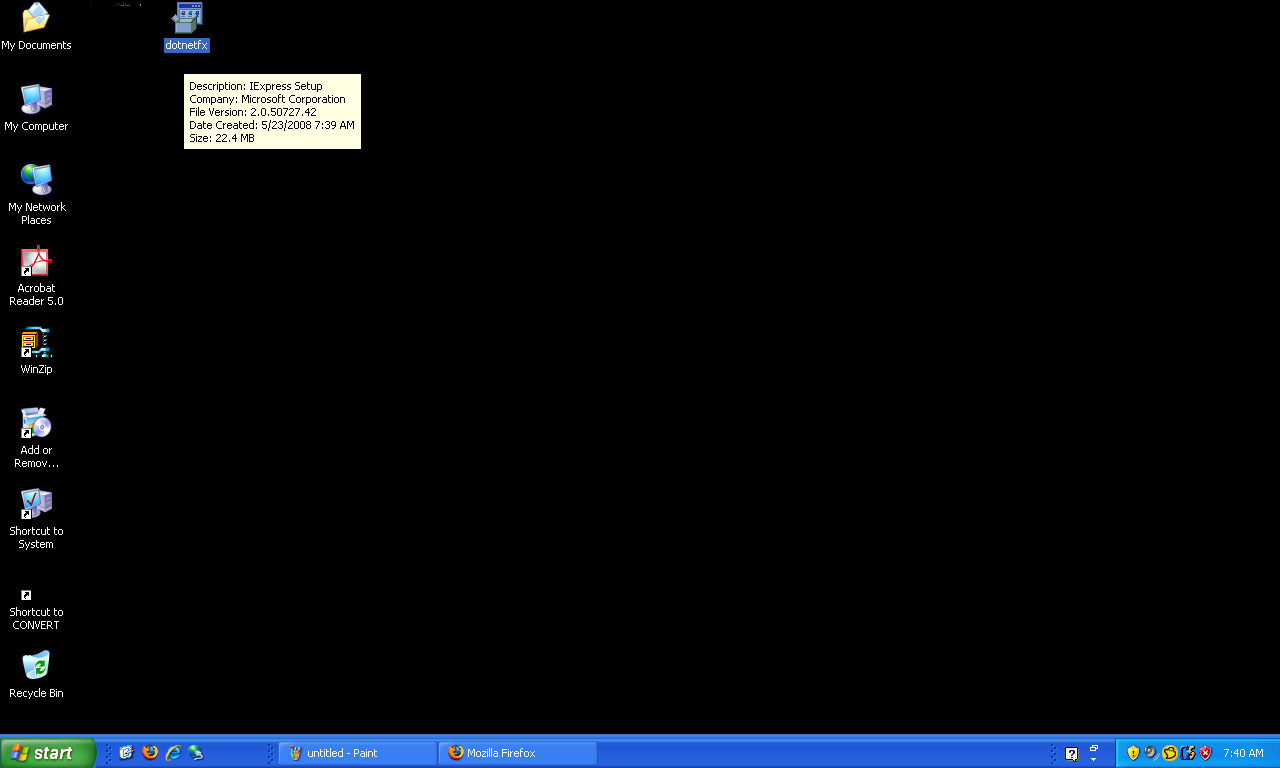
    The option to run the file may or may not be present. If so, “Run” may be selected to run the .NET installation immediately after the download is complete. Otherwise “Save” should be selected which will prompt for the location to save the file. The Desktop is the best location for ease of use. When the save is complete, the “dotnetfx.exe” file will be on the desktop as seen below. Double-click the icon to run the .NET installation.

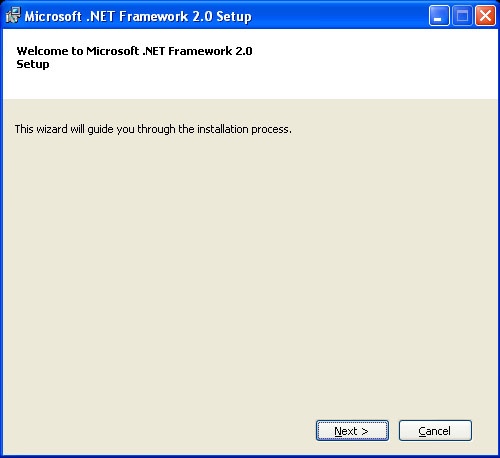
    The .NET installation begins with a “Welcome” screen:

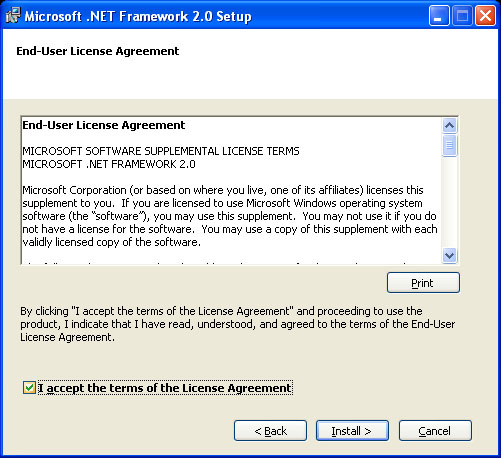
    Select “Next” to go to the “License Agreement” dialog. If the terms of the license are acceptable, then check the “I accept the terms…” box and select “Install”.

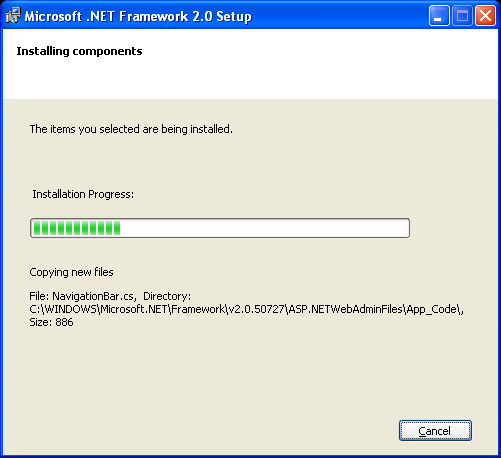
    A progress dialog similar to the following should appear:

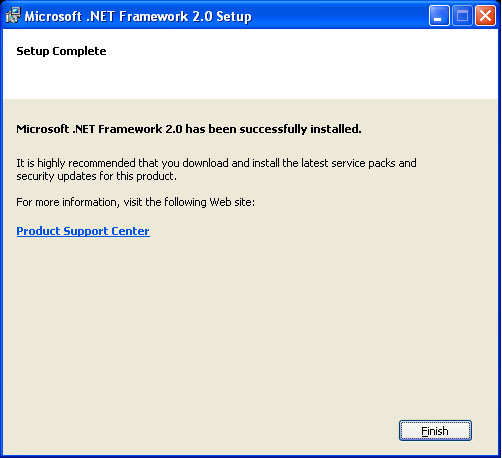
    The following notice should appear when the installation is complete:

    Read More
  • Pine AfterMath FAQ: Stop Experiments Immediately

    AfterMath_NEW
          This FAQ applies to versions 1.2.3383 and greater.

    When monitoring an experiment's progress in real-time using the experiment monitor, the user may need to IMMEDIATELY terminate an experiment without any additional prompts of the “Are you sure?” style.

    By default, pressing the “Stop” button will result in additional prompts to be sure an experiment is not accidentally terminated prematurely, to let the user decide whether or not to save the data, and let the user decide whether or not to abort any experiments queued to run after the current one.

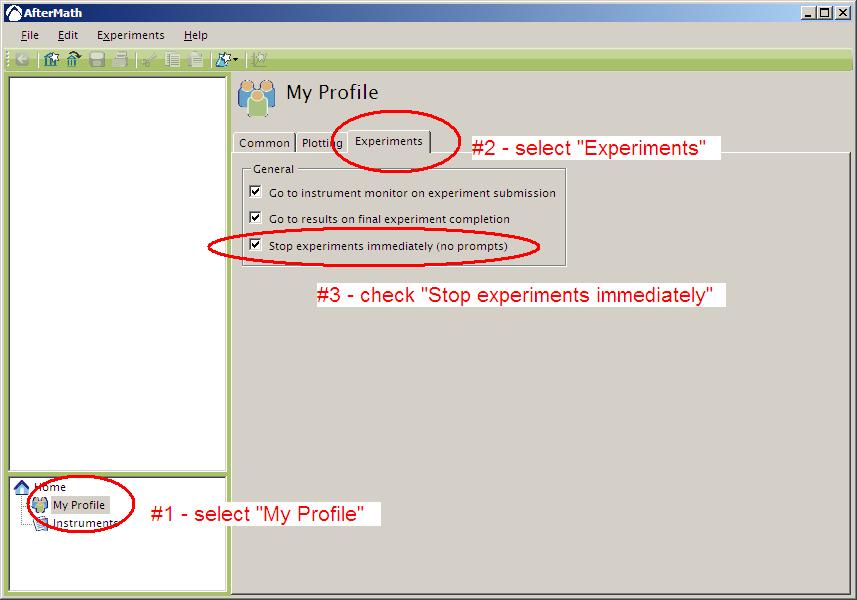
    The default behavior can be changed on the “Experiments” tab of “My Profile” settings (as shown in the image below) so that the current experiment will terminate immediately, the data will be saved, and all queued experiments will be aborted.

    Read More
  • Pine AfterMath FAQ: WaveNow Electrode Grounding

    AfterMath_NEW
          Can I ground the electrodes of the WaveNow/Nano/XV potentiostat?

    The cell cable for the WaveNow family potentiostats provides an analog ground line (black lead). However, sometimes it is necessary to ground the working (red lead) or counter (green lead) electrode. How can this be done?

    The WaveNow family potentiostats are not connected to Earth-ground through the AC mains power supply adapter. However, a path to Earth-ground *MAY* exist through the USB cable. The analog ground (black cell cable lead) is by default internally electrically connected to the USB ground line. That means that the counter, working, and reference electrodes MUST NOT be connected to Earth-ground, either directly or through other Earth-grounded equipment.

    A provision has been made to isolate the USB connector (and its ground) from the other electronics in the potentiostat, thereby created a “floating” instrument, and as such ONE of either the working (red cell cable lead) OR the counter (green lead) can then be electrically connected to a common Earth-ground. Grounding the working electrode has been observed to produce more environmental electrical noise in the data than grounding the counter electrode does.

    WaveNow family potentiostats manufactured after the 23rd week of 2012 include a jumper to control this grounding option. On earlier units, there is a zero-Ohm resistor which must be removed from, or added to, the circuit board (note that since it is zero Ohms a simple “solder bridge/blob” or wire can be laid across the pads to complete the circuit, an actual resistor is not necessary). The default configuration for all versions from the factory is for all grounds (digital, analog, and Earth) to be connected in common – meaning the working and counter electrodes SHOULD NOT be grounded unless the modifications shown below are made.

    The manufacture date can be determined from the first 4 digits of the 7-digit serial number on the white bar-coded label on the bottom panel. The format is week+year+number as wwyynnn (e.g. units manufactured in the 23rd week of 2012 will have serial number 2312nnn). See photos below to identify and locate the grounding options.


    [/toggle]

    Read More
  • Pine AfterMath FAQ: Wireless USB Troubleshooting

    AfterMath_NEW
          The wireless USB hub doesn't seem to work. What can I do?

    The wireless USB hub can be a great way to run the WaveNow potentiostat inside a glovebox that doesn't have USB feed-throughs. However, it can be difficult to set up and and get working. Furthermore, if it doesn't work, it might be an incompatibility of USB hardware that cannot be corrected other than by using a different computer.

    To help with this, we have provided a document with suggestions for setup and troubleshooting the WiRanger USB hub here.

    Read More
  • Pine AfterMath FAQ: Specify Reference Electrode

    AfterMath_NEW
          How can I specify the type of reference electrode used in an experiment?
    This FAQ applies to versions 1.2.3208 and greater.

    At this time there is no way to specify the type of reference electrode (e.g. Ag/AgCl) used in an experiment. Therefore, all experiment results are with respect to whatever electrode was actually used. That is, there is no automatic offsetting to adjust results to match any standard reference electrode (e.g. NHE).

    However, it is possible to manually offset the data measurements. Click here for details.

    Read More
  • Pine AfterMath FAQ: Invert Axis

    AfterMath_NEW
          This FAQ applies to versions 1.0.2447 and greater.

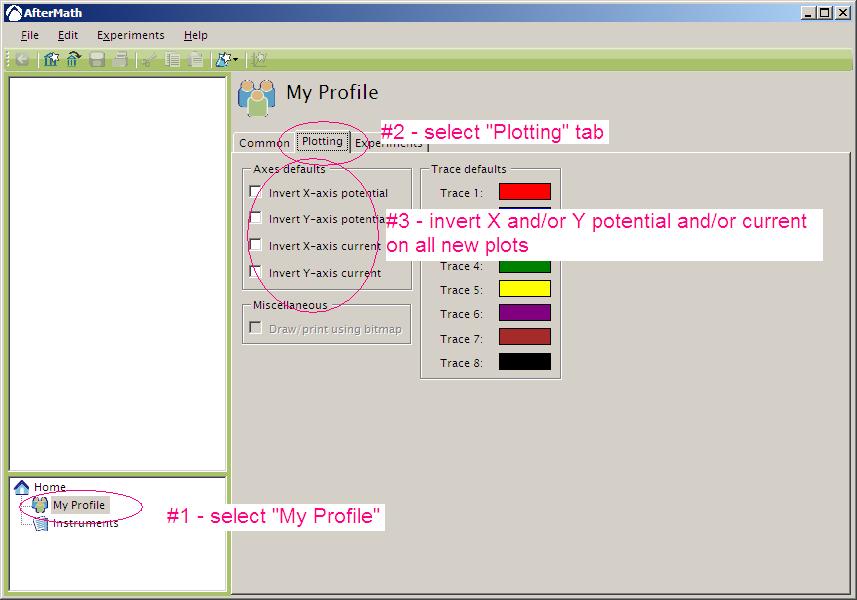
    There are two ways to invert a plot axis (e.g., plot increasing potential from right to left rather than left to right). The first way configures any individual axis on any plot AFTER the plot has been created. The second way controls how certain axes (e.g. potential or current) are configured when a NEW plot is created. Note that the second way also controls the axes on “live” view plots during the experiment.

    Option 1

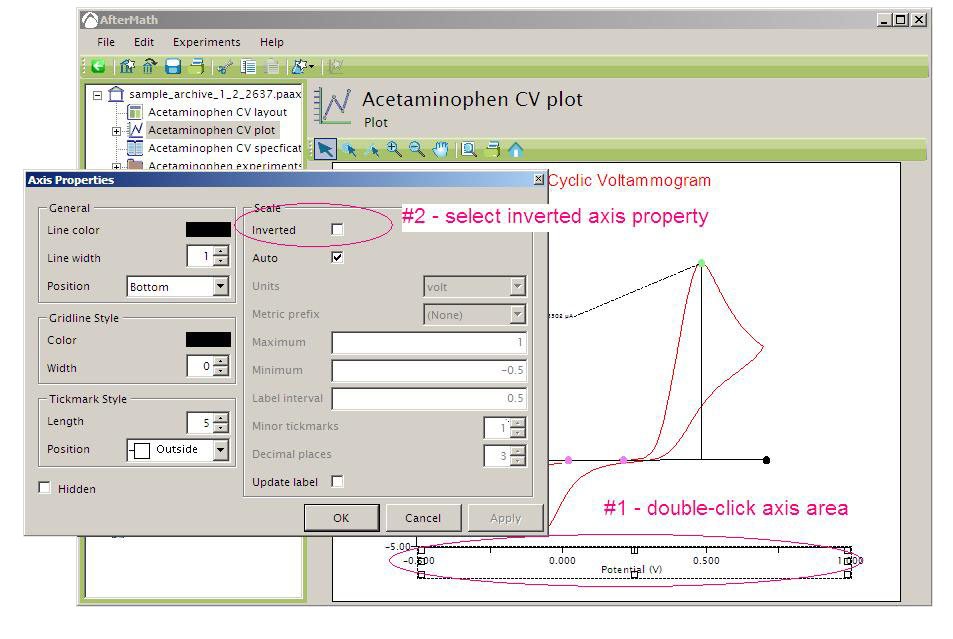
    Any individual axis on any plot can be inverted by using the axis properties dialog as shown in the image below:

    Option 2

    The default for all new plots can be controlled in the user's profile settings as shown in the image below. Note that this applies to all new plots, and there is currently no way to specify these settings on a per-experiment-type basis:

    Read More
  • Pine AfterMath FAQ: Long-term Experiments

    AfterMath_NEW
          This FAQ applies to versions 1.0.2447 and greater.

    Overview

    Experiment data is at risk of being lost – due to power failure, hardware failure, or software failure – until written to disk.

    Unfortunately, at this time AfterMath data cannot be written to disk until after the experiment is completed. Therefore data is always at risk during an experiment, and continues to be at risk even after the experiment is completed until the user manually selects “save archive” to write the data to disk.

    This means that there is presently no way to automatically or manually save the data during experiments.

    Note that this will be addressed in future releases of the software.

    Additional Details

    If the power to the potentiostat is interrupted (or the potentiostat is simply turned off), the experiment data collected so far is not lost. The user can end the experiment and choose to keep or discard the incomplete data. If the data is kept, it is placed into the archive at that time. However, until the user manually selects “save archive” it is still not written to the disk, and therefore is still at risk.

    If power to the computer were interrupted ( or the hardware or software failed ), then ALL the data for the experiment in progress would be lost ( as well as any other new data not manually saved to disk using “save archive” ). As discussed above, the data is lost even if the user has selected “save archive” during the experiment because the data for an experiment in progress is not placed in the archive until the experiment is completed.

    Therefore, it is most critical to keep the PC running, and second most critical to keep the potentiostat running. Battery-powered backup is recommended, via the laptop battery and/or an uninterruptable power supply (UPS).

    Read More
  • Pine AfterMath FAQ: Perform Button Greyed Out

    AfterMath_NEW
          This FAQ applies to versions 1.0.2447 and greater.

    Problem

    AfterMath cannot perform any experiment because the “perform button” is greyed out

    Possible cause

    AfterMath did not find the permissions “license key file” that matches the serial number of the potentiostat.

    Explanation

    When installing the software from the original CD or other media, a license key file that matches the serial number of the potentiostat should have been copied onto the system drive. When AfterMath does not find that license key file, the instrument cannot perform any experiments.

    However, if the software was downloaded from the web site, there is no license key file. Therefore it must be copied from the installation media (or another computer where a working installation was previously done).

    The name of the license key file contains the instrument or interface serial number and has the file extension ”.papx”. If no license key file can be found then contact Pine for assistance.

    For USB-connected potentiostats (e.g WaveNow, WaveNano) the 7-digit serial number can be found on a label on the instrument itself. For PCI-connected potentiostats (e.g. AFCBP1 Bipotentiostat) the serial number of the PCI interface card is used and can be found using software as explained here.

    Solution

    Copy the license key file to the directory where the “AfterMath.exe” file is located. The default during installation would be something like “C:Program FilesPineAfterMath” but the user may have chosen another location. More information can be found here and here.

    After copying the file, restart AfterMath, the perform button should be available.

    Read More